Thursday, June 30, 2011

Cafe Apron

I made a cafe apron for my friend, Sierra's bridal shower.  However, for obvious reasons had to wait until after the shower to post it.  So here it is!
(sorry, some of these pictures are blurry..I took these before I got my new and improved camera.lol)


I remembered to take pictures all along the way, so I can give a pretty good tutorial!
I was looking over aprons online and didn't see any that I was crazy about, but then I remembered these really cute "paper bag" skirts that I had seen a while ago and decided to base the apron's style off of that.  


Here's my little drawing of it..


Ok, so to start off, I measured my current apron and decided on the measurements I was wanting to do.  I cut out my rectangle to be that size.
Next, I clean finished all of my edges by turning under the edge of the fabric, ironing it down ,and then turning them under one more time.


 Then I stitched those down.  I did an edge stitch along the edge of the apron. 


The next part was fun.  Figuring out where and how far apart I wanted to do my pleats along the top.  You can play around with your pleats until they're at a good distance apart for you.  I believe I did a 3 inch gap in the middle as shown here:

I chose to do my pleats 2 inches apart.  I also decided on having a half inch deep pleat.  So in order to measure this correctly, I measured 2 inches from the last pleat and marked that spot. Then I measured 1 inch from that marking(because since I wanted the depth of my pleat to be 1/2 inch, I needed to have 1 inch to fold over).  You then fold your second marking that you made(this should be 3 inches away from your last pleat) to the first marking you made(this one is the one 2 inches from your last pleat).  This shows this:


 To make sure your pleat is straight all the way down, you can place a seam gauge underneath the pleat and measure it all the way down making sure that you have 1/2 inch the entire length of your pleat.  You also want to make sure that your pleat matches up in distance from your last pleat all the way down as shown below:

 Eventually, you will have this:
 Once you have the desired amount of pleats, you can either leave them pinned that way, or I chose to baste them down so I wouldn't have to worry about them while I worked on the next thing.However, don't do this step.  Once all of your pleats are securely pinned, sew 2 seams that are parallel with the top of your apron, but are about where you want your tie to go across.  Make these lines of stitches a little closer together than the width of your ties though so that you know they will be hidden once the tie is in place.

 I set that one aside and began working on the tie, the front pocket, and the belt loops.
For the tie, I took a 6 inch wide piece of fabric and made a tube out of it. (Note** In order to get the desired length for my tie, I had to sew more length onto either side of my middle piece)  To make the tube I just took my long strip of fabric, folded it right sides together and stitched along the long raw edge, and one side of your tie.  Once that's done, you can turn that piece right side out.  I then edge stitched the open side closed by turning my raw edges to the inside of the tie, ironing them down, and matching those edges up.  I also edge stitched all the way around the tie to make it more uniform and add detail.

Next I went onto the front pocket.  I made my own pattern for that and cut it out:
Once again..it's sideways..sorry.
I then did the same process to the curved edges of the pocket that I did for the edges of the apron.  I turned them under once, ironed them down well, then turned them under again and ironed and pinned them down. 


For my own little fun touch I wanted to put an S on it for Sierra.  I printed an S off of the computer and then used that as my pattern to cut the S out.  I then used some stick glue to help keep the S in place while I stitched it down.

This seemed to work pretty well for me.
To stitch this down was a little trick, but it worked out! I used a zig-zag stitch and tightened my stitches up so that they were practically on top of each other and also were my desired thickness.  I went pretty slow as I stitched all the way around the S.  Sometimes I even used the hand wheel to make sure I was getting what I wanted. Tip: make sure your foot is down when you finish so that if necessary, you can rotate your fabric before beginning to sew again.

For the left over 4 edges, I just turned them under once and ironed them because they are going to be edge stitched onto the apron.  After preparing those edges, I placed the pocket where I wanted it on the apron and edge stitched all of the sides down except the curved edges where the hands can reach in.

After the pocket is securely attached, then I moved onto my belt loops.  I chose a thickness for my belt loops and doubled that and added an extra 1/2 for seam allowances. I chose to just sew one long strip then cut the belt loops individually after that so that I wouldn't have to do a bunch of little strips

Then you just sew that strip along the long raw edge and turn it right side out.  I cut my belt loops(don't forget to add extra length to these because you will be turning them under a few times).Turn the raw edges under twice again and top stitched them down to the apron where you want them. For this stitch, I chose to use a zig-zag stitch and just tightened the stitch so that the stitched were practically right on top of each other:


For a final touch, I chose to make a bow to put on the front, center of my tie.  I made it about 2-3 inches thicker than my tie, but I basically just followed the same steps for making the tie when I made the bow.  The only thing I did differently was that instead of edge stitching all the way around the bow, I just edge stitched the 2 ends.  I then made an even smaller tube and followed the same steps for the tie, and used that little strip to scrunch the bow.  I secured the bow down by hand stitching it onto the apron, and then pushed the edges of the bow in just a little and tacked them down as well so that they would stay a little puffy and off of the fabric.

And VOILA! You have an apron!


This is me with the apron on..it'll probably be cuter on her because I had a big belly for the apron to have to go around!lol


This did take a little bit of time, but it was an exciting project and was personalized for my friend which was fun!  Enjoy!

Monday, June 27, 2011

Hair clips

hmm. where to start. I have lots of crafts..but i've gotten behind in my postings..bad news. Today I think I'll add some more hair pieces though

This guy was an attempt at doing a hair piece with feathers.  I can't make up my mind about him though so we'll have to wait and see how it looks on my babies head.  


Why does this thing turn my pictures sideways?
For this hair piece I just made a felt rosette then added a few sand beads to the top of it.  For a how-to on felt rosettes of this style click here!
 For this little guy I got the idea/pattern from makeit-loveit.com and just added a few of my own embellishments.


I really like this one because it's my size!lol I can't remember where I found the tutorial for this flower..But if I find it, I'll definitely post it! 


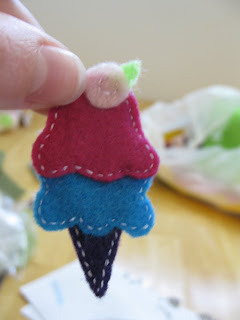
This one is Joel's favorite. He LOVES color.  I found this idea off of etsy.com in the lou and lee "store".


I had so much fun making all of these! They definitely take some time though, but so worth it!:)

Frisbee and a lack of pictures..

Joel and I are SOO bad about remembering to take pictures! On Friday we went and threw the frisbee around, and I brought the camera with us.  I took about 2 pictures and then put the camera away..and go figure, I forgot to take it out agian!lol We did a few other things this weekend that we meant to bring the camera for too! We went to Red Mango and got a free smoothie and ice cream because we had coupons, and as soon as we got home I remembered that I completely forgot to take pictures! Hopefully I'll get better though before the baby comes! That'd be sad!
Anyway! Here're the few that I did get though.:)
^Just before walking out the door


There's a great park right by our place that we're lucky to be able to go play at!

p.s. I just want to add that this picture was taken at about 8:30 pm...Utah is so weird! It was still light at 9 pm!

Friday, June 24, 2011

Nothin like a good ol' PB&J

Since being pregnant, I haven't really craved too many things.  Every once in a while I get some cravings, but they're usually so close to what I use to crave before being pregnant that I don't think they count (i.e. sweets and chocolate..).  However, there have been just a few "regulars" I spose you could call them.
  • A regular Quesadilla
  • Pancakes!
  • and good ol' PB&J
I crave peanut butter and jelly sandwiches all the time! Most days I have lunch, and then for my afternoon snack, it's a Peanut Butter and Jelly sandwich! Today was no exception.:)

Wednesday, June 22, 2011

Baby jacket, and my first REAL baby quilt!:)

I've gotten a few more projects done, but I didn't have a camera! We sold both of our old cameras to get a newer one that takes better videos..but unfortunately, there was a lag time between the selling of our old cameras and getting our new one! But we finally have a camera!
The first project was from a book that Joel got for me for my birthday in November.


It's a sewing book with lots of patterns for baby things.  The book is called Handmade Beginnings and there's the link for it on Amazon.  Anyway, one of the projects is this super cute baby jacket, but I just had to wait until I knew what I was having before I could go pick out the fabrics and all that jazz.  Well..here's the finished product:
    So anyways, she has full instructions and patterns in her book! Such a fun project!

NEXT!! I have been working on this quilt for a few weeks now and just finished the binding yesterday! For the pattern for this "Sexy Hexy" quilt go here!
Joel and I went to the store and found lots of fun fabrics:

Then we spent an afternoon cutting out the pattern pieces(Yes, joel helped! And he helped A TON I might add!)

We then separated them into their piles by which pieces went with which to make a hexagon.

Then I spent a couple of days sewing the pieces together until I had this:
I finally got to putting it all together when I went to "quilt night" with one of my friends.  Basically my friend's mother-in-law teaches all of her daughter-in-laws how to quilt and I got invited to join!:) So anyway, her mother-in-law has this amazing quilting machine that I got to use to put it all together! So here it is! The finished product:

\
I even quilted our soon-to-be daughter's name into the quilt..but you'll have to wait til she's here to see that picture. (those of you that I have accidentally squealed to, keep it quiet!:) ) so anyway! those have been just a few more of the fun things I've worked on while my hubster is off at work!

Tuesday, June 14, 2011

Fun felt hair clips

Well, I got really into making little felt hair pieces..and I have quite a few.. but the funny part is that I'm not done with all the little designs I found online.  Basically what I am saying is that my poor daughter is going to be wearing felt hair pieces a TON!lol Here are some that I've made:


(Sorry, for some reason this flower won't turn, but you get the idea)

Like I said, I found these designs on the internet on various blogs and such and tweaked a few of them just a little, but they're very easy to make, and felt is sooo cheap! So it's great! I just drew the designs on a piece of paper, and then traced each individual part of the design onto another piece of paper and then cut out the individual shapes and assembled!

For the back of them, so that you can slip a clip into it I did 3 different designs.
1) You can just leave it flat on the back(which is what I did for the little purple rosette) so that it can be glued/taped or whatever method you would like to use to get it to stick straight to your baby's head.

2) I doubled up the backing so that I could just put a slit into the second, or back piece of felt.
  Example:

3)I attached a little piece of felt across the back so that the clip could just slip behind that piece.
     Example:

So there ya have it! There are sooo many different designs that people have come up with! I literally went to google images and typed in felt hair clips and lots came up.